Tag: solar setup:

  • RV Solar Setup: Essential Guide and Tips

    Understanding Your Energy Needs

    Calculating Power Requirements

    Before diving into the whole solar setup, the first thing I had to do was figure out how much power I actually needed. It’s like trying to figure out how much coffee you need on a road trip; too little, and you’re in trouble! I started by making a list of all my devices – from my fridge and lights to my phone chargers. Adding up their wattages gives you a good starting point.

    Next, I calculated how many hours I would need each device running per day. For instance, my lights were only on at night, while the fridge was running 24/7. This step is crucial because, believe me, you don’t want to end up with insufficient power when you’re out in the wild.

    Once I had my total watt-hours figured out, I looked for a solar setup that could cover that amount. I’ll tell you this—it feels great knowing exactly what your energy needs are when you’re shopping around for solar panels! It saves a ton of headaches later on.

    Assessing Your Space

    After getting a handle on energy demands, the next step I took was checking out my RV’s roof space. Not every RV roof is created equal! I measured how much space I had for solar panels considering any vents or air conditioners that might get in the way.

    If you’re planning this setup, remember to consider how many panels you’re aiming for based on your energy needs. I didn’t want to overcrowd my roof, causing air flow issues. So, finding that balance was key!

    And don’t forget about the angle! An angled roof can give you a nice boost in solar efficiency! I made sure to keep those factors in mind before pulling the trigger on my purchase.

    Setting Realistic Expectations

    It’s nice to dream about living off the grid with unlimited power, but I learned quickly to keep my expectations realistic. Solar setups are fantastic, but the efficiency depends a lot on where you’re camping. I made sure to consider my travel plans and where I would likely be stopping.

    Another thing I learned is that cloudy days can actually throw a wrench into things—not everything is sunshine and rainbows in the solar world. So, factoring in battery storage when planning your setup was a game changer for me.

    In a nutshell, understanding your energy needs and setting realistic expectations can help you build a more effective and manageable solar setup.

    Choosing the Right Solar Equipment

    Solar Panels

    Now that I was clear on my needs, it was time to pick the solar panels. I found myself overwhelmed by all the options, but a little research goes a long way. I found monocrystalline panels to be the most efficient for the space I had, giving me more power without taking up too much room.

    Another thing to keep in mind is the durability. While I was dreaming of road trips, I had to remember that the panels would be exposed to the elements. I chose panels with better weather resistance—gotta love those rainy days, after all!

    Don’t forget to check the warranties. A strong warranty gives you peace of mind that the company stands behind its product. After some digging, I landed on a few options that offered solid performance and warranties I loved.

    Batteries and Inverters

    Next up were batteries and inverters—these are your lifeline when the sun dips below the horizon. I went for deep-cycle batteries because they can handle being drained and recharged regularly, which is exactly what I needed for off-grid living.

    When it came to inverters, I learned they convert the solar energy collected into usable power for my devices. I wanted a pure sine wave inverter for the smoothest operation with sensitive electronics. This piece is crucial in preventing any of my precious gadgets from malfunctioning!

    Size matters here as well; I made sure to choose an inverter that matched my energy requirements. It’s all about harmony in the setup, and having the right sizes ensures optimal performance!

    Solar Charge Controllers

    Solar charge controllers were the last piece of the puzzle for my solar setup. They’re necessary to prevent overcharging the batteries, which can be a disaster waiting to happen. I went for a programmable one, so I could tailor the charging to the specific batteries I had.

    Setting up the charge controller properly is key. I made sure it matched up with my system’s voltage and wasn’t just a random choice. It’s all about making informed decisions!

    Lastly, I found out that having a monitoring feature on my charge controller allowed me to keep an eye on my system’s performance, which provides that extra reassurance while out exploring.

    Installation Tips and Tricks

    Preparing Your RV

    Time to get my hands dirty! Before installing anything, I made sure my RV’s roof was clean and free from debris. It’s like prepping a canvas before painting—if you skip this step, you’re asking for trouble!

    Then I mapped out where I was going to place everything. I used a pencil to mark spots to drill the mounting holes for the panels. I didn’t want to end up with no idea where I was going mid-installation.

    Lastly, if your RV has a rubber roof, ensure it’s totally compatible with the mounting hardware you choose. I double-checked everything to avoid any misadventures down the road.

    Running Cables and Wiring

    Running cables can feel like a daunting task when you’re knee-deep in wires, but it was surprisingly simple! I made sure to use proper gauge wires to avoid any overheating issues. Following the rules will keep everything nice and efficient.

    One hack I used was labeling my cables as I went. Trust me on this one—it’s a lifesaver! There’s nothing worse than getting everything set up only to find you’ve mixed up positive and negative connections.

    I also made sure to run the wires through protective conduits to keep them safe from wear and tear. Just little things like this can make a world of difference in the long run.

    Testing Your System

    Once everything was wired up, it was finally time to test the system, and wow, what a relief! I took some time to monitor the setup, checking each component to ensure everything was functioning as expected. Watching the meters come to life brought an overwhelming sense of accomplishment!

    I made sure to check how the system performed in different conditions—solar panels in sunlight vs. shade. It’s all about understanding the limits and capabilities of my new setup.

    Finally, I created a simple maintenance schedule to check my gear for wear-and-tear every few months. Regular maintenance can spare you plenty of headaches later on, which I happily learned from experience!

    Maintaining Your Solar Setup

    Regular Inspections

    Now that my solar system was up and running, I needed to keep it in shape. I set up a timeline for regular inspections—checking for any dirt, debris, or physical damage to the panels. A clean panel is a happy panel!

    During these inspections, I also monitored battery health. Making sure the connections are tight and that there’s no corrosion helps to avoid any surprises down the line. After all, preventive maintenance is always cheaper than fixing a major issue!

    Plus, I documented any changes or findings during inspections—it has proven helpful to reference over time. This way, I can keep track of how my system is performing and any trends that pop up.

    Battery Maintenance

    Battery care can’t be overlooked in the solar game, that’s for sure. I learned to regularly check the electrolyte levels in my lead-acid batteries and top them off with distilled water as needed. Keeping them healthy means my power keeps flowing!

    I also invested in a multi-meter to keep track of their voltage. This little gadget quickly gave me insights into whether my batteries were healthy or if they needed some extra love.

    With lithium batteries, maintenance is often a breeze. Still, if you go that route, just make sure to read up on the specific maintenance requirements—they’re usually pretty low, but it’s good to know what to look for!

    Upgrading as Needed

    Finally, I keep my eyes peeled for innovations in the solar world. As technology progresses, that might mean upgrading certain components down the line. I was keen on staying ahead to ensure my system remained as efficient as possible!

    It’s also smart to assess my travel patterns. If I find that I’m trekking more remote areas with less sun exposure, I might consider adding more panels or a bigger battery bank in the future.

    Don’t forget to read user reviews before making any upgrades. It’s helpful to see what others have experienced—no one likes investing in gear that doesn’t live up to the hype!

    Conclusion

    Setting up a solar system in your RV is an exciting adventure that allows you to enjoy your travels without worrying about power. With a bit of planning, the right equipment, and regular maintenance, you can ensure a smooth and efficient solar setup. Just remember to enjoy the ride—happy camping!

    FAQ

    1. What do I need to consider when calculating my RV’s energy needs?

    You’ll want to list all devices you plan to use and their wattage. Calculate how many hours each device runs daily to get a total energy requirement in watt-hours.

    2. How do I choose the right solar panels for my RV?

    Look for panels that match your power needs and available roof space. Consider durability, efficiency ratings, and warranty options that work for you.

    3. What are the benefits of using deep-cycle batteries?

    Deep-cycle batteries are designed to be repeatedly discharged and recharged, making them perfect for solar setups where energy use varies throughout the day.

    4. How often should I inspect my solar system?

    I recommend conducting inspections every few months, checking for dirt, damage, and ensuring all connections are secure. Regular maintenance extends the life of your setup.

    5. Can I upgrade my solar setup later on?

    Absolutely! As technology improves or your energy needs change, you can always upgrade components like panels, batteries, and inverters to keep your system running optimally.

  • RV Solar Setup: Essential Guide and Tips

    RV Solar Setup: Essential Guide and Tips

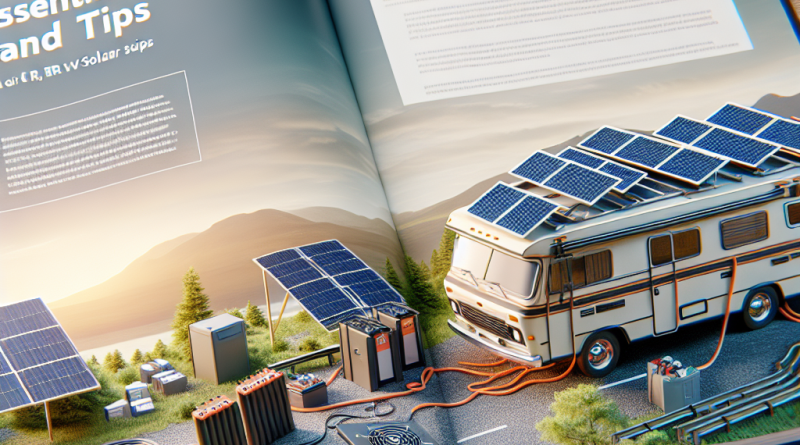
    Understanding RV Solar Power

    What is RV Solar Power?

    Let me tell ya, using solar power on my RV has been a game changer! When I first started researching RV solar setups, I had no idea what I was getting myself into. Essentially, RV solar power is the use of solar panels to convert sunlight into electricity, allowing you to harness the power of the sun to charge batteries and run appliances while you’re off the grid.

    It’s not just for hardcore eco-warriors, either! Anyone can benefit from having a solar setup in their RV, whether you’re boondocking in a remote location or parked in an RV park. More freedom to roam and explore? Yes, please!

    In its simplest form, the system consists of solar panels, a charge controller, batteries for storage, and an inverter to convert the stored energy into usable power. Getting to grips with these components is the first step in unlocking the solar lifestyle!

    Why Go Solar on Your RV?

    In my experience, the benefits of going solar are immense. First off, there’s the independence it gives you. You’re not tied to a grid, and you no longer have to awkwardly search for that one RV park that has available power hookups.

    Secondly, think about the savings! Sure, there’s an upfront investment, but you’ll save on campground fees and fuel. Plus, you get to skip those pesky generator noises, leaving you to enjoy the sounds of nature instead!

    And let’s not forget the environmental perks. It feels great to reduce your carbon footprint while enjoying the great outdoors. It’s a win-win situation that I can’t recommend enough.

    How Solar Works for RVs

    Now, how does all this solar magic work? It all starts with those shiny solar panels up on the roof. They absorb sunlight and convert it into DC electricity, which gets sent to the charge controller.

    The charge controller works like a traffic cop, regulating the flow of electricity to the batteries to prevent overcharging. Once you have the energy stored in your batteries, you can tap into it anytime you need it!

    If you’re running AC appliances, you’ll also use an inverter. This handy device takes that stored DC power and converts it into AC power, making it usable for all your household gadgets. Perfect for those coffee lovers who just can’t start the day without brewing their morning fix!

    Selecting the Right Solar Components

    Solar Panels Selection

    Choosing solar panels is kinda like picking a new car – you have to find the right fit for your needs. There are various types out there, such as monocrystalline, polycrystalline, and thin-film, each with its pros and cons.

    I personally prefer monocrystalline because they tend to be more efficient and take up less space on the roof. If you have a limited area, they might be the best choice for you, too!

    Always consider your power needs when selecting panels. The wattage you choose will play a significant role in how much electricity you generate. It’s definitely worth doing the math and finding out what works for your lifestyle.

    Charge Controllers: The Heart of the System

    The charge controller is crucial, and don’t skimp on this piece! It regulates the voltage coming from the panels and protects your batteries, which can be a real lifesaver.

    There are two main types of charge controllers: PWM (Pulse Width Modulation) and MPPT (Maximum Power Point Tracking). I’ve found that MPPT models are more efficient, especially if you’re dealing with larger setups.

    Reading up on the specs of charge controllers can make a big difference in your RV solar experience. Trust me, keeping your batteries healthy is essential for powering your adventures!

    Batteries: Storing the Sunshine

    Choosing the right batteries can be daunting since there’s so much to consider. Lead-acid batteries are the most common but can be heavy and require maintenance. On the flip side, lithium batteries are lighter, have a longer lifespan, and require less upkeep, but they can be pricier.

    I went with lithium batteries, and it was the best decision! They charge faster, can be discharged more deeply, and just overall make my life easier on the road.

    Always calculate your consumption needs and select batteries that fit those needs, ensuring you have enough power for those late-night movie marathons or that killer blender for smoothie-making!

    Installation Tips and Best Practices

    DIY vs Professional Installation

    Here’s where you get to make a decision: Do you want to take the DIY route or call in the pros? I’ll admit, I jumped in and did my installation myself, mainly because I love a project that involves learning something new.

    If you’re comfortable with basic tools and wiring, go for it! There are tons of tutorials and resources out there. Just take your time and measure twice, cut once – you don’t want to mess up and have to fix it later.

    On the flip side, if the thought of working with electricity makes you a bit queasy, hiring a professional is a smart move. It’s all about what you’re comfortable with and if you’d rather be out exploring rather than tinkering under the roof!

    Safety Considerations

    Safety first! Ensure you’re using high-quality components and taking the necessary precautions while installing your solar setup. I always double-check connections to avoid any short circuits that might ruin my day!

    Wear safety goggles and gloves when working with tools and batteries. It’s not just about protecting your gear – it’s about keeping yourself safe from electric shocks or spills.

    Also, don’t forget about ventilation if you’re storing batteries. Adequate airflow will help keep everything running smoothly and prevent overheating.

    Testing Your Setup

    After installation, the fun part is testing everything out! I was beyond excited to see if my panels were working as expected. Start by checking all your connections, then monitor how your system performs.

    Use a multimeter to check your battery voltages and see if everything is functioning as it should. If your battery isn’t charging properly or your appliances aren’t getting enough power, it’s worth troubleshooting before you head out on your adventures.

    Once you’re confident everything is working great, enjoy some off-grid living! There’s nothing quite like knowing you have the power of the sun at your disposal.

    Maximizing Solar Efficiency

    Optimal Panel Placement

    Our solar panels’ placement can significantly impact how effective your setup is. You want them to get maximum sun exposure throughout the day, so angle and position are key.

    If you’re parked in the shade or facing the wrong direction, it can make all the difference in terms of efficiency. I’ve learned to scout out spots with as much unobstructed sunlight as possible.

    Investing in a tilting solar panel mount can make a world of difference, allowing you to adjust the angle based on the sun’s position. A little adjustment goes a long way!

    Maintaining Your System

    Just like your trusty RV, your solar setup needs a little TLC to keep it running smoothly. Regularly inspect your panels for dirt or debris that might block sunlight. A thorough wipe down every few months can really help maximize efficiency!

    Also, check your connections and cables. Over time, you might find loose wiring or corrosion, so stay on top of these things. Better to catch a small issue early than deal with bigger headaches down the road!

    Battery maintenance is crucial too. If you’re using lead-acid batteries, make sure to check water levels regularly. For lithium batteries, keep an eye on performance and replace them when it’s time.

    Energy Conservation Practices

    Using solar power means it’s also wise to practice energy conservation. This can be as simple as using LED lights or turning off your electronics when not in use. I’ve become quite the pro at utilizing my resources wisely!

    Another tip is to plan your high-energy activities during peak sunlight hours. For instance, running appliances like your microwave during the day when your panels are generating power makes total sense. Maximize that sunlight!

    Keeping your energy consumption in check will ensure you have plenty of power for the fun stuff. Nobody wants to run out of juice while attempting to watch that epic sunset on a quiet evening!

    Wrap-Up

    All in all, setting up an RV solar system was one of the best investments I’ve made. The freedom to roam without worrying about power is exhilarating! With the right components, proper installation, and a few maintenance tips, you’ll be on your way to enjoying the great outdoors, powered by the sun.

    Don’t be intimidated by the technical aspects; take it one step at a time, do your research, and soon enough, you’ll be a solar pro like me!

    I hope you found this guide helpful. Join the solar revolution and get out there to explore with confidence!

    FAQs

    1. How do I know what size solar system I need for my RV?

    To determine the size, assess your power needs based on your appliances and usage patterns. Add up their wattage and ensure your solar panels can meet this demand, even on cloudy days.

    2. Can I install solar panels on any type of RV?

    Yes! Most RVs can accommodate solar panels, but you’ll want to assess your roof space and weight limits. Look for a flat surface with good sun exposure for best results.

    3. How much maintenance do solar panels require?

    Solar panels require minimal maintenance. Regularly clean them and check connections for wear. For batteries, monitor water levels (for lead-acid) or performance (for lithium) to keep everything running smoothly.

    4. How long do solar panels last?

    Most solar panels come with a warranty of 25 years, and they can even last longer if properly maintained. Keep an eye on performance as they age, and consider replacement when efficiency dips significantly.

    5. Is solar power worth the initial cost for an RV?

    Absolutely! While the upfront cost can be notable, the long-term savings on campground fees and fuel, along with the freedom of off-grid camping, make it worth every penny in my opinion!

  • Best Solar Setup for Metal Roofs Guide

    Best Solar Setup for Metal Roofs Guide

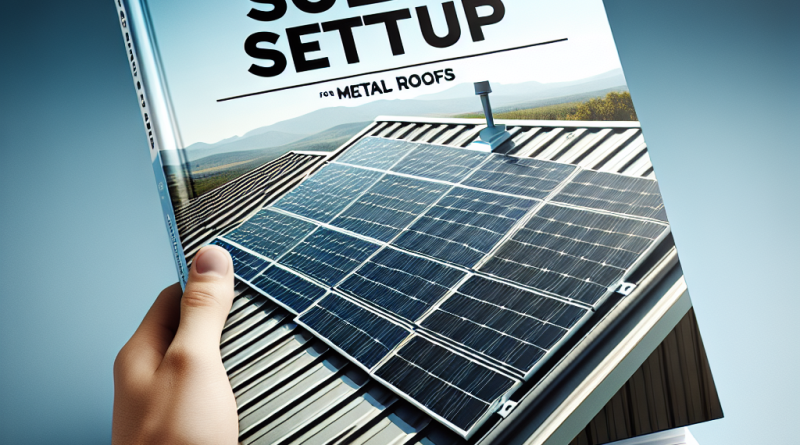
    Understanding the Advantages of Solar Energy

    Cost Savings on Energy Bills

    Let me tell you, one of the biggest perks I’ve discovered about solar energy is the drastic reduction in energy costs. When you switch to solar, you suddenly realize that those monthly bills don’t have to be as high as you thought. It’s like finally getting out of a bad relationship – your wallet feels lighter, and your heart feels happier!

    Over time, the savings add up. Whether you’re in a two-person household or a bustling family of five, the relief of slashing your electricity bills really empowers you to feel more financially free. Plus, with the federal tax incentives available, the initial investment becomes way more manageable. Who doesn’t want that?

    And don’t forget the potential increase in your property value. A home equipped with solar panels is attractive to many buyers nowadays, translating to a better return on investment if you decide to sell. So yeah, solar energy is a win-win!

    Environmental Benefits

    Another reason I’m so enthusiastic about solar energy is the positive environmental impact. Utilizing solar power significantly reduces your carbon footprint, and that’s something we can all feel good about. Knowing I’m contributing to a cleaner planet makes my heart swell.

    As we face the challenges of climate change, switching to solar helps reduce reliance on fossil fuels and lowers greenhouse gas emissions. Each time I see those solar panels soaking up the sunshine, I’m reminded that I’m doing my part to protect our planet for future generations.

    Plus, with governments increasingly pushing for sustainable energy solutions, I feel like I’m actually a part of a larger movement. Solar energy isn’t just a trend; it’s a future I want to be part of, and you should too!

    Energy Independence

    Who doesn’t love the idea of being less reliant on outside sources for energy? With solar, you’re taking a stand against fluctuating energy prices and those annoying power outages. Once I installed my solar panels, it was like I’d taken the reins of my own energy fate.

    The beauty of solar energy is that it empowers you to generate your own power. It’s a game-changer! You won’t have to worry as much about rising utility costs. Plus, with battery storage technology, you can store surplus power for later use, making you even more self-sufficient.

    It’s a comforting feeling knowing that during a storm or an unexpected outage, I’ll still have power to keep things running smoothly. It’s all about control – and that’s something I really value.

    Choosing the Right Solar Panels for Metal Roofs

    Types of Solar Panels

    When you’re considering solar for your metal roof, it’s key to dive into the types of solar panels available. There are generally three main types: monocrystalline, polycrystalline, and thin-film. Personally, I’ve had my eye on monocrystalline panels because they tend to be more efficient and space-saving, which is crucial for roofs that might not be expansive.

    Then you’ve got polycrystalline panels, which are often more affordable but can take up quite a bit more space, as they’re slightly less efficient. If you’ve got a large, beautifully expansive roof, you might be able to make these work! Lastly, there are thin-film panels—they’re lightweight, and flexible, but their efficiency and lifespan don’t generally compete with the others.

    Ultimately, your choice will depend on your specific needs, budget, and how much sun your roof gets. I’d urge you to do your homework before deciding; it’s a big investment!

    Roof Mounting Options

    Mounting is incredibly important, especially with a metal roof. I learned the hard way that not all mounting styles are created equal! The best option for a metal roof is a standing seam system. This installation method avoids penetrating the roof, which lowers the risks of leaks—something none of us want, right?

    Another option is a flush mount, but that might require drilling into the roof. If you ask me, it’s definitely not worth the risk. Reflect on your comfort level with each method, and don’t hesitate to reach out to a professional if you’re unsure!

    It’s a bit like picking the wrong size of shoes – a bad fit might only show itself later on, but once it does, it’s too late! So, go with a reliable mounting system that aligns with your roof’s specifications.

    Consulting a Professional Installer

    Okay, let’s be real – while you might be tempted to DIY your solar installation, consulting a professional installer can save you a whole bunch of headaches down the road. I learned this lesson early on; their experience can make a world of difference in efficiency and aesthetic appeal.

    Finding a certified installer means you’re getting someone who understands all those technical bits and can adapt to your specific roof type. They’ll also handle permits, which is a godsend when you’re busy juggling everything else in life!

    Plus, a good installer will also provide insights about warranties and maintenance, helping you to steer clear of potential pitfalls. Trust me, it’s worth every penny to ensure your solar setup is done right from the get-go.

    Maintaining Your Solar Panels

    Regular Inspections

    Once you’ve decided to go solar, the next biggie is maintenance. I can’t stress enough how important regular inspections are. Just like you wouldn’t skip a check-up at the doctor’s office, your solar panels need some love and attention too! Schedule at least an annual inspection to ensure everything is functioning optimally.

    During an inspection, professionals will check for areas that may need cleaning, signs of wear and tear, or even issues related to your inverter. It’s like a health check for your energy system, and it keeps you in the know about your setup’s performance.

    By being proactive, you’ll prolong the lifespan of your solar array and maximize its efficiency over the years, ultimately saving you money in the long run.

    Cleaning Your Panels

    Keeping those panels clean is super important too! Dust, dirt, and debris can really zap your panels’ efficiency, so I recommend giving them a good cleaning at least twice a year. If you’re in an area with lots of rain, maybe you could get away with once a year, but generally speaking, it pays to keep them clean.

    The best way I’ve found is to use soft brushes, or you can hire someone to do it. Just avoid anything abrasive, as you don’t want to scratch your panels – that would be a total bummer. Think of it like washing your car; nobody wants to drive around in a dirty ride, and your solar panels deserve the same care!

    Believe me, once you see the difference a clean panel makes in energy output, you’ll be singing a different tune about solar maintenance.

    Monitoring Performance

    Many modern solar systems come equipped with monitoring apps that let you track your energy production in real-time. Honestly, it’s pretty cool. Every time I check the app, I get a little rush seeing how much energy I’m generating, it’s like my own personal energy scoreboard!

    Paying attention to patterns in energy production can alert you to any dips in performance. If you notice a drop-off, it might be time to call in your installer for a check-up. It’s all about being proactive rather than reactive!

    Over time, you’ll also gain a better understanding of how weather and seasons impact your energy generation, which helps inform how you can maximize your setup during high production months!

    Financing Your Solar Installation

    Understanding Different Financing Options

    Considering financing? You’re not alone! When I first looked into my solar setup, I was blown away by the different financing options available. From loans to leases, there’s something for everyone’s budget. It’s all about doing what works best for you financially.

    A solar loan is a popular choice, allowing you to own the system and take advantage of tax incentives. Meanwhile, leasing means you won’t have to worry about hefty upfront costs—but keep in mind, you won’t receive those tax benefits either.

    So do your research! I found various online calculators that help assess which option really fits into my financial picture, and it made life so much easier to visualize my investment.

    Government Incentives

    You’d be surprised at how many incentives are out there! Local, state, and federal programs often provide rebates, tax credits, and performance-based incentives to help ease the financial burden of solar installation. Seriously, keep your eyes peeled for these opportunities—it could save you thousands!

    The Federal Solar Tax Credit (ITC) allows you to deduct a significant percentage from your federal taxes. Initially, I was like, “Wait, I can get money back for going green?” It felt like a win-win right from the get-go. Every cent counts when it comes to solar investment!

    And don’t overlook local incentives. Some utility companies will even pay you for the excess energy you generate—talk about a sweet deal. So make sure you check what’s available in your area because you might find some hidden treasure!

    Payback Period Calculations

    One thing I found super useful was calculating my payback period. It’s the time it takes for your savings to equal the cost of the solar panels. This helps you figure out when you’ll start seeing a return on your investment. I suggest pulling out a spreadsheet; it doesn’t have to be fancy, just some basic math to see how long you can expect to be paying off your system with your energy savings!

    Don’t forget to factor in all your incentives and benefits. It’s amazing how quickly that payback period can shorten when you account for rebates and tax credits. Usually, it can range anywhere from 5 to 15 years—definitely worth the wait if you ask me!

    Once your system’s paid off, it’s all profit from there, and that makes it feel like you’ve hit the jackpot. You’ll also be feeling good about all that clean energy you’re producing, knowing you invested wisely.

    Frequently Asked Questions

    1. How do I know if my metal roof is suitable for solar panels?

    Your metal roof is actually one of the best types for solar panels due to durability and weather resistance. It’s important to ensure there’s enough unshaded space for optimal sun exposure. Consult with a professional for a detailed assessment!

    2. How long do solar panels last?

    Most solar panels have a lifespan of about 25 to 30 years. With proper maintenance and regular inspections, they can continue to produce energy efficiently even after that period!

    3. Are there any risks associated with installing solar panels on my metal roof?

    As long as you hire a qualified installer, the risks are minimal! Stand seam mounts can be very secure without penetrating the roof, preventing leaks and damage. Just ensure to follow maintenance guidelines to keep everything in check!

    4. How much can I expect to save on my energy bill?

    This largely depends on your energy consumption and the size of your solar system. Many users report savings between 50% and 100% on their electricity bills after installation and utilizing incentives!

    5. Can I install solar panels myself?

    While it might be tempting to DIY, I highly recommend hiring a qualified solar installer. There’s a lot that goes into it, including local codes and requirements, which can be tricky if you are unfamiliar. Relying on a pro ensures a hassle-free setup!

  • Best Solar Setup for Farms

    Best Solar Setup for Farms

    Understanding Your Energy Needs

    Identifying Energy Consumption

    First things first, you’ve got to know what you’re working with. Take a good hard look at your farm’s energy consumption. This means going through your utility bills and figuring out how much energy you typically use. Are there peak times when you seem to be using most of your power? Most farms have specific periods when energy use skyrockets, especially during planting or harvest seasons.

    I remember the first time I did this — it felt like a homework assignment, but I learned so much. I found out that my biggest energy hogs were my irrigation systems and livestock cooling systems. It’s crucial to get a handle on when and where your energy is going.

    Once you have a good grasp on your consumption, you can start to map out how much solar energy you’ll actually need to cover those costs. It’s like budgeting, but for solar, and it’s super important for the next steps.

    Evaluating Energy Sources

    Next up is understanding your current energy sources. Are you fossil-fuel dependent, or do you use any renewable sources already? Each energy source comes with its own set of costs and environmental impacts. I found that knowing this helped me realize just how much I was spending and how much of an impact I could make.

    If you’re running a hybrid setup, it’s a good time to think about how much of your energy can come from solar and how much you’re willing to invest in this transition. You don’t have to go all-in right away; sometimes, a phased approach works best.

    Researching energy efficiencies and the types of solar technology available to farm operations will shed light on what best matches your needs. It’s an exciting era for solar technology!

    Setting Realistic Goals

    This step is all about setting practical and attainable goals. You might dream of running your entire farm on solar, but is that a realistic goal to achieve right now? Maybe start smaller — like covering specific buildings or systems first. That’s how I rolled in my first year.

    One of my goals was to reduce energy costs by 30% within the first five years. Having that clear goal kept me focused and motivated. It also made it easier to track progress and adjust my strategy along the way. Don’t be afraid to dream big, but start friendly!

    Once you set your goals, let them guide your decisions about the types or sizes of solar installations you’ll consider. It will help keep everything aligned and make your sense of purpose even stronger.

    Choosing the Right Solar Technology

    Types of Solar Panels

    So now that we have a firm grip on our energy needs and goals, let’s dive into what solar technology options are out there. There are mainly two types of solar panels you’ll be looking at: monocrystalline and polycrystalline. The former usually takes the crown for efficiency, but the latter can be more cost-effective.

    I often recommend checking the warranty and lifespan of panels too. A good panel should last at least 25 years! No one wants to be replacing panels every few years because that’s just throwing money down the drain.

    My experience has shown that investing in slightly more expensive, high-efficiency panels often pays off in the long haul, especially on farms where space can be limited. Higher efficiency means less space needed, making the installation process easier.

    Inverters: What You Need to Know

    Next on the tech checklist is inverters. They convert the direct current (DC) produced by solar panels into alternating current (AC) that your farm uses. There are string inverters, microinverters, and power optimizers. Which one works best for you? That’s a question I had to navigate.

    String inverters are usually the most cost-effective, but if you have a complex roof or shading issues, microinverters might be the way to go. They offer better efficiency in certain circumstances, though they come at a higher upfront cost.

    My advice? Consult with a solar expert to evaluate your specific setup and help you choose the most effective inverter for your needs. Just remember, the inverter is a crucial piece of the puzzle!

    Storage Solutions

    Your solar setup wouldn’t be complete without some form of energy storage. Battery storage allows you to make the most of your solar energy, especially during the crucial nighttime hours. There are various options available, each with different costs, capacities, and effectiveness.

    I encountered some sticker shock when exploring battery systems! The initial investment can be high, but the long-term savings on energy bills helped me feel more comfortable with the payment. Factor in the amount of power you typically use and when you use it to choose the best battery system for your farm.

    Think of it like your farm is its own small power grid. Having storage gives you that extra flexibility and resilience — something I’ve found incredibly beneficial, especially during storms when the grid can go out!

    Installation and Maintenance Considerations

    Choosing a Qualified Installer

    Okay, you’ve picked out your solar tech, now you need to find someone to install it! This is crucial. I learned the hard way that all installers are not created equal. Look for someone with solid reviews and understand the warranty options they provide, as that will speak volumes about their service.

    It helps to get multiple quotes! I did, and it allowed me to understand the price range and what to expect from different companies. Treat it like any other part of farm planning — a bit of diligence goes a long way!

    Ask about their experience with farm installations specifically. It’s a different ballgame than residential work, and you want to ensure they know how your unique needs shape the installation process.

    Understanding the Installation Process

    Knowing what to expect during the installation will ease some of that anxiety. Generally, it starts with site assessment, which may include evaluating the roof or ground space, followed by permits and grid registrations.

    Once all permits are sorted, the actual installation can take as little as a day! For larger farms, this may take longer as they may require extensive racking systems and more panels.

    Make sure to keep an open line of communication with your installer throughout this whole process. It’s important to stay updated, and it gives you a chance to ask any last-minute questions you might have.

    Routine Maintenance

    Now, let’s talk maintenance. People often think solar is a “set it and forget it” kind of deal. While it’s brilliantly low-maintenance, it does need some TLC. Regular cleaning and inspections are key. Dust and debris can accumulate and impact efficiency; trust me, I’ve seen it happen!

    I recommend setting up a regular schedule based on the climate in your area. If it’s windy and dusty, you might need to clean those panels more often than if you’re in a rainy climate, where nature does the job for you.

    Also, don’t forget to have a technician inspect the system at least once a year. They’ll check the wiring, inverters, and all critical components to ensure everything is running smoothly.

    Exploring Financial Incentives

    Government Grants and Rebates

    Time to talk about the cash! Solar power is not just good for the environment; it can also be good for your wallet! There are various government grants and rebates that can significantly reduce the upfront costs of installation.

    Check out programs like the federal investment tax credit (ITC) that allow you to deduct a portion of the solar installation costs from your taxes. Each state has different incentives, so definitely do your research here — it can save you a ton!

    From experience, I can say that staying on top of these incentives is vital. They can change year by year, so it’s worth consulting with a financial advisor familiar with energy credits and incentives.

    Financing Options

    If upfront costs still feel daunting even with incentives, don’t sweat it! Financing solutions like solar loans or power purchase agreements (PPAs) can help ease the burden. Many companies offer payment plans, making it more feasible for farmers who might be cash-strapped.

    I personally went the loan route. It allowed me to install my system without a massive cash outlay upfront, which eased my financial worries while still being able to start enjoying solar benefits right away!

    So, be sure to explore all your options. Every farmer’s financial situation is different, and there’s no one-size-fits-all solution when it comes to financing solar setups.

    Long-Term Economic Benefits

    Last but definitely not least is understanding the long-term financial benefits. Many farmers often overlook just how much they can save on energy costs down the line. Once your system is paid off, the savings are substantial. I’ve even reinvested my savings back into my farm!

    Beyond energy savings, having solar can increase your property value, which is another feather in your cap. Many prospective buyers are interested in farms with renewable energy sources, so it can be a big selling point down the line.

    These economic benefits also mean you can use your funds for other exciting projects on the farm. It’s a win-win situation, and that’s something you want to keep in mind as you embark on your solar journey.

    Frequently Asked Questions

    What are the key benefits of solar energy for farms?

    The major benefits include substantial cost savings on energy bills, increased property value, and a reduced carbon footprint. Plus, it can provide energy independence, allowing you to manage your power usage better.

    How do I know the right solar setup for my farm?

    You’ll want to start by evaluating your energy needs and consumption patterns. Professional assessments can also help determine what type of solar technology would work best for your unique situation.

    What maintenance is required for solar panels on farms?

    Regular cleaning and inspections are essential to ensure your solar panels operate efficiently. You may also want to have a technician check your system at least once a year to catch any potential issues early on.

    Are there financial incentives for installing solar on farms?

    Yes, there are numerous government grants, rebates, and tax credits that can significantly reduce installation costs. Be sure to research what’s available in your state, as they may vary.

    How long does it take to install a solar system on a farm?

    The installation can usually take anywhere from a day to several days, depending on the size and complexity of your setup. It’s best to stay in communication with your installer for a clear timeline.